Monday, May 2, 2011

Fun in the Garden

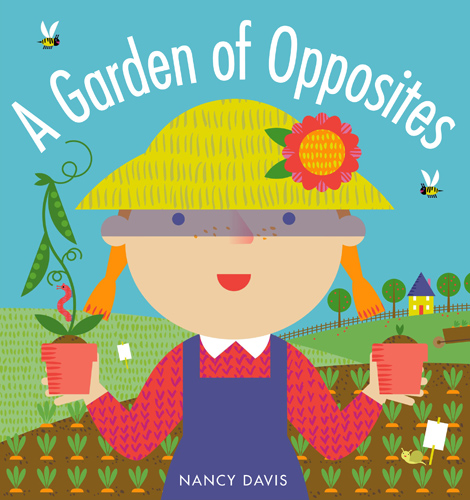
This morning we read A Garden of Opposites by Nancy Davis.

This is a simple book with great illustrations. It teaches basic opposite concepts and has a great gate-fold displaying the whole garden of opposites. Very cute. We enjoyed it, and it had some new opposites that Alex didn't know.

After reading the book we made a little flower garden of our own. We used construction paper, Do A Dot paints and cupcake liners. Alex painted the cupcake liners
 I had cut out "stems and leaves" out of construction paper. Alex glued them all on a piece of blue paper.
He added a yellow pom-pom to the center of the flowers and I guided him in making a short caterpillar and a long snake with his Do A Dots, just like in the book. 

This afternoon we had a fun time playing outside. Alex searched for bugs. He "caught" a earth worm.

He decided to make a birdie after hearing a crow "cawing." He made it out of sticks. I was impressed. Maybe he has a future as a sculpture artist.

Sunday, May 1, 2011

I Heart Faces {Soft and Sweet}

The theme over at I Heart Faces is soft and sweet. This is a old photo of Alex. This is his first Easter, he was 3 days shy of a month old and had just finally came home from the hospital. I recently came across it and decided to do some post processing. I think it fits the theme pretty well, what is more soft and sweet than a sleeping newborn wearing bunny ears.
Check out all the soft and sweet entries over at:

Thursday, April 28, 2011

What Do you do with Broken Easter Eggs?

Make them into grass head eggs, of course! We had a few eggs that cracked when I was blowing out the egg contents. I cracked the tops off and we colored them anyway. We added some soil and some grass seed. We had some "face" stickers that came with a egg decorating kit, that Alex used to created some faces on the eggs. We watered them and put them by the window. In a couple of days the grass began to sprout.


Six days later they now have long "hair." We gave one a haircut and another got a trim and ponytails. Alex really enjoys watering them, checking them each morning to see how long their hair is.

Tuesday, April 26, 2011

Garden Sensory Bin

Time for a new sensory box. Since spring is in the air, I decided I would make Alex a garden box.

The "dirt" in the box is some old coffee and espresso beans that my Mom was going to throw away.
I purchased the spade, rake, magnifying glass and butterflies at the Dollar Tree for $3. We already had the other insects, play veggies, terra cotta plant pot and flowers (really textured paint brushes).

I added a piece of styrofoam under the coffee grounds so that the flowers and butterfly would stand up. Plus Alex can move and "plant" them. 

I printed a template for the seed packet from here. I took some of the espresso beans and painted them to make "seeds."
This box will be a jumping off point for some seed, plant, vegetable/food, and insect lessons. Also some sorting games. Plus it is just fun to dig in and explore.

Thursday, April 21, 2011

Decorating Easter Eggs

This should be our last Easter post. Boy we were busy creating this Easter, I think because Easter was so late. Anyway here are our Easter Eggs. Alex really enjoyed the whole process and they came out so cute!


We read a cute little book in the morning, Ollie's Easter Eggs by Olivier Dunrea.

This is part of Dunrea's Gossie and friends series.  It is about a group of goslings on a farm. The older goslings are all busy dying and hiding Easter eggs. Ollie is too busy playing. When he see the eggs, Ollie wants Easter eggs too and he has a plan on how he'll get them. When they hide their eggs, Ollie finds them and stashes them away in his nest. He unknowingly created a Easter egg hunt for the older goslings. The illustrations are very cute. We enjoyed the book a lot.  


So here is our eggs. We used a simple Dollar Tree egg dying kit and some egg decorating stickers from Target. 
Yes, the ones in back are meant to be have holes on top, they are for tomorrow's project.


Adding glitter, his favorite part.


Hope everyone has a happy and fun Easter!

Tuesday, April 19, 2011

Wet Felted Eggs and a Chick


I had purchased a bag of wool roving from Etsy, last fall to try some wet felting. I made a few acorns that I wasn't impressed with. I decided to give it another try when I saw how a tutorial on wet felted  Easter Eggs from here. It was a lot of fun, and I love how they turned out. They would be a lot of fun for older children to make, but my three year old wouldn't have the patience to complete it. This is a how I created mine.

First I decided on what color wool roving I wanted to use.  This is a bag of miscellaneous size pieces and colors of wool. It is perfect for little craft projects like this. I also taped the opening and the little holes in the end of a plastic Easter egg as to keep the water from collecting inside the egg and it taking forever to dry.

Next, I loosely wrapped the roving around the egg like a burrito. Try to fluff the wool and not have any thick edges. Then it was time to dunk it into some warm soapy water. (You can use dish soap or hand soap) The wool feels like a loose mess, I really thought it wasn't going to work. I gently rotated an it from hand to hand and after a few minutes the wool began to take shape. I guess gentleness is the key in this step, so your eggs doesn't turn out with lots of visible creases in the wool.  I dunked it again in the warm water and gently began to squeeze, while still turning the egg. After a few minutes you will feel the wool fibers tightening and becoming more solid.
At this stage, I dunked it on cold water. This shocks the fibers and makes the felting process stronger. I alternated between cold and warm for a few times till all the soap was rinsed out and the felting process felt complete. There seems to be no exact science to wet felting, everyone seems to do it a little differently. I was happy with my results.
After I did the two eggs I decided I need a chick to go inside. I found this tutorial and loosely followed it. Here is my little chick.

After my eggs and chick had dried overnight, I added the final embellishments. I cut the plastic eggs out of the wool using a zig-zag pattern to create a cracked egg look. I stitched around the opening with embroidery thread. I am not great at hand sewing.  Once the chick was dry I cut its wings out and added the beak and feet out of orange craft foam and orange embroidery thread. I would have preferred felt, but I didn't have any on hand. I stitched on the eye with black embroidery thread.
One could always add some candy inside the egg or some other treats and have a really cute and unique Easter gift.

Chocolate Coconut Bird Nests

This afternoon I made some cute and super easy coconut bird nest treats. They were so easy and literally took 5 minutes to make.  The original recipe came from here. I adapted the recipe a little. This is how to make my version:
  • 1 (12-ounce) package or 2 cups semisweet chocolate chips
  • 1 (7-ounce) package sweetened flaked coconut
  • Handful of jelly beans or egg shaped candies (I used Whoppers Mini Robin Eggs)
  1. Melt chocolate chips in the microwave (about a minute for 2 cups). Stir in flaked coconut.
  2. Drop by tablespoonfuls onto a wax paper-lined baking sheet. Using the back of a spoon press out a hollow to form a nest.
  3. Divide candy egg pieces among the nests. Chill until firm, about 10 minutes.